Brian Still Hasn’t Beat Pools of Darkness, Part Five - Whoops! Brian Beat Pools of Darkness!
By Brian • 23 December 2019
I beat Pools of Darkness. But what happened to the blog series?
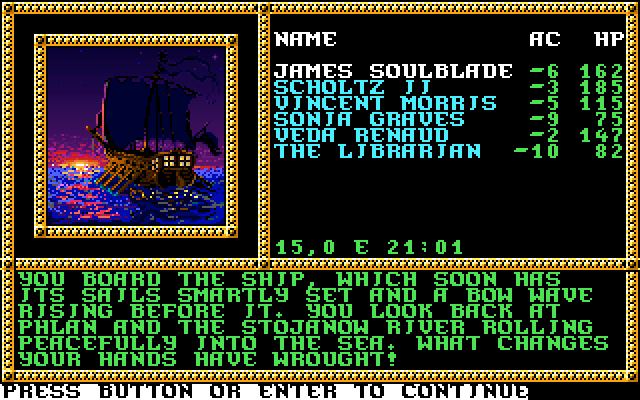
Well, the short version is that, and I’m a little embarrassed to say, I got so into the game that I couldn’t keep up with writing about it. I took a lot of notes throughout, but apparently this was the attempt in which I figured out all the puzzles and tough fights and sticking points, and no other games got in the way of finally finishing this thing. Before I knew it, all of Bane’s lieutenants were defeated, the Realms were restored, and my party, having experienced a taxing wealth of adventures, boarded a boat across the Great Sea to paradise like Frodo & Co. at the end of Lord of the Rings. The blog was intended to be my accountability piece, the extra incentive to see the game through to the end, but it turns out I didn’t need it!
The long version is that, by introducing what would have been a fairly long-running blog series to my already 1,004-item long to-do list, I found myself—once AGAIN—trying to do too much with my life. Instead of working on those 1,004 projects already in progress, I started another one. I always do this, and I have a whole blog about this realization and maybe finally getting my life in order that is next on the docket.
So, what happened in the rest of the game? I’ll share the highlights. It’s a long read, so I hope you like computer roleplaying games!
After defeating Thorne, we returned to Zhentil Keep, where I finally solved a puzzle that had stumped me since I was a kid. Near the top of Manshoon’s Tower at the center of the keep, Manshoon unleashed the Gelt, an invisible pet with an agonizing glare so painful that adventurers cannot proceed past it. I got stuck on the Gelt as a kid and always wondered what lay beyond. It turns out you can cast Power Word: Blind to blind the gelt. That never occurred to me as a kid, and I never kept the spell memorized until this playthrough, so the option never presented itself until now.

The payoff for finally defeating the Gelt was, unfortunately, pretty disappointing. We found Manshoon, and he trapped us in a crystal barrier. To show us his true power, he summoned a harpy so angry that it turned on Manshoon and started tearing down the tower. Manshoon fled, his crystal barrier broke, and we got out of there before the roof of the tower collapsed on us. And that was it. It wasn’t the final confrontation and vindication for which I hoped, but at least Manshoon’s tower got busted up real good! Still, I honestly don’t know if this was a main quest task or a side quest. I always ended up skipping it as a kid, but completing it didn’t seem to make a difference.

We rescued a multitude of slaves that the Drow collected in the caverns under Zhentil Keep. Some were used as workers, while others had their life essence sucked out of them to create Pets of Kalistes—giant, intelligent super spiders that cast magic and resist magic cast upon them. Y’know, since regular spiders aren’t bad enough. We found the means of their creation, an unholy fountain of a substance called Fire of Night, and destroyed it, but it unfortunately did not seem to affect the number of Pets of Kalistes I continued to encounter throughout the rest of the game. A real bummer.
We defeated Kalistes’ gathered forces in the heart of her subterranean temple, then discovered a Pool of Darkness leading to her dimension, chock full of more Drow and an endless onslaught of giant spiders. Luckily, some sidequests throughout Kalistes’ land rewarded us with amulets and a Ward of Safe Passage that kept some (but not all) of the Drow and spiders off our backs. We still encountered plentiful opposition. The Ward also allowed us access to Kalistes’ parlor without being devoured by spiders.
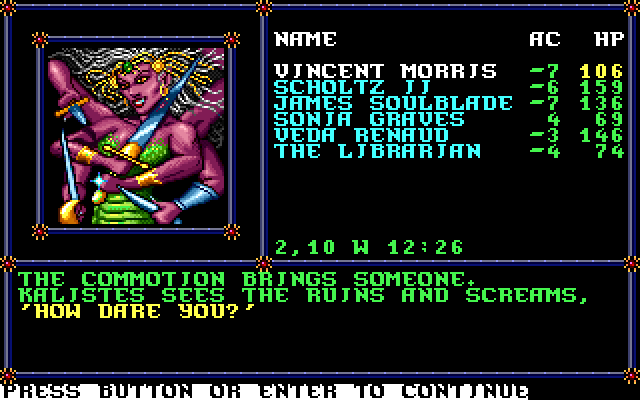
While exploring the parlor, we stumbled upon a clue that Mariliths, the family of demons to which Kalistes belongs, are highly protective of their young. Later, we discovered a room full of eggs, and we busted all of them open with minimal hesitation. I felt as though I should have experienced a moral dilemma in killing Kalistes’ young, but I was so fed up with killing man-eating spiders by the time we’d reached this point that there really wasn’t any question of what I needed to do. This drew the attention and understandable ire of Kalistes, and she and her vast entourage of Drow and Pets charged, ready to tear us apart. They succeeded in doing that about a dozen times. I finally gave up and returned to Limbo to train up a couple of levels, which returned James’s paladin abilities to him, and gave my mages a couple of extra casts of Delayed Blast Fireball. (The mages’ higher levels also seemed to make the fireballs more effective against the magic-resistant Drow.) That seemed to be the difference-maker—another two or three tries, and Kalistes and her forces were exterminated.
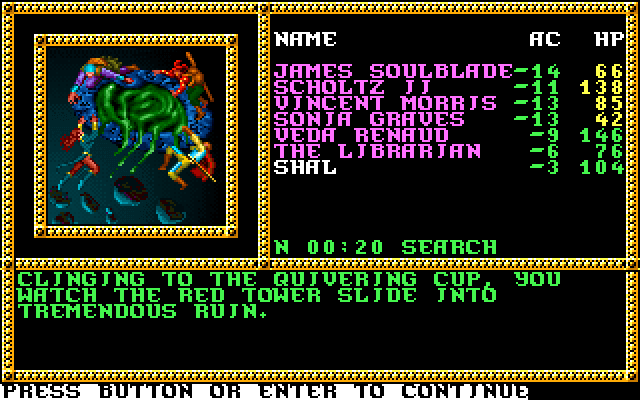
Our next stop was the Red Tower near the ruins of Yulash and Hillsfar, where we squared off against Marcus and his cadre of fanatical Moander culstists. Before I go on, we need to talk about Moander. I mentioned him briefly some posts back, but now it’s time to go in-depth. Moander is a god composed of a big rotting mass of plant matter and garbage. If set loose on a physical plane, Moander rolls along, engulfing everything in its path like a katamari of filth. For whatever reason, a bunch of cultists in the Realms worship Moander and want to bring him to the Realms to destroy everything. Why anybody would want to worship a big pile of dead plants escapes me, but I suppose evil has no bounds. Anyway, he made it to the Realms, briefly, in the Curse of the Azure Bonds novel, but here in Pools of Darkness, Moander finds himself locked in the astral plane by the elves, where he hangs in suspended animation. The artists for this game depicted him as this big, handsome, green sleeping giant, which plays into the plot later, but I prefer to think of him as a big pile of trash.

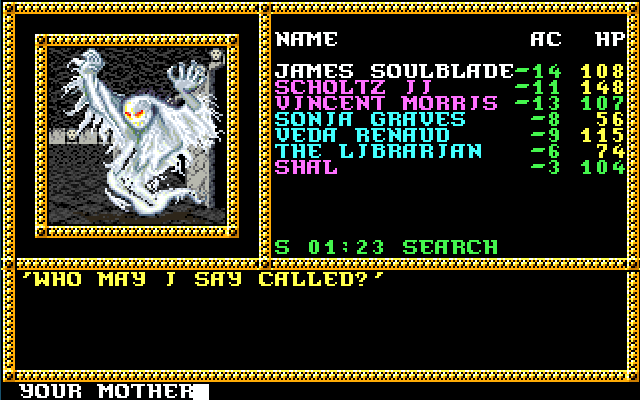
Most of the trek up the tower was standard fare. There were various tasks to complete on the top two floors, usually involving wiping out manufacturing/animating facilities for Bits O’ Moander, before the climactic battle against Marcus will trigger. However, we got lost in the maze-like top two floors, so we struggled to find all the tasks needing to be done to battle Marcus. We first went to his chambers before accomplishing all of the tasks, and his spectral servant let us know that Marcus was out tending to a certain area of the tower (hints at the things the party must accomplish), and asked our identity. We had some fun with that, but the servant did not seem amused.
In the basement of the tower, there were sealed doors with people yelling at us from the opposite side. Believe it or not, they were yelling at us from Phlan, because Marcus somehow entombed the entire city under the tower, which seems really nuts. I demand a spell like that be available to my mages.
Also in a cell in the basement, the party met Shal, a sorceress and a character from some of the Forgotten Realms novels. She was split into two beings by Marcus’s cleaving magic—her wisdom, which is the being who joined the party, and her magical powers and evil side, which is a being named Petra who was under the thrall of Marcus. Shal needed to meet Petra to pull herself back together and regain her magic.
We battled a flood of Moander cultists and Banite priests, who all LOVED to cast Hold Person, so they proved to be a priority to eliminate first. The Cultists also make frequent use of Blade Barrier, a spell that shreds anything in a 2×2 square with whirling knives.
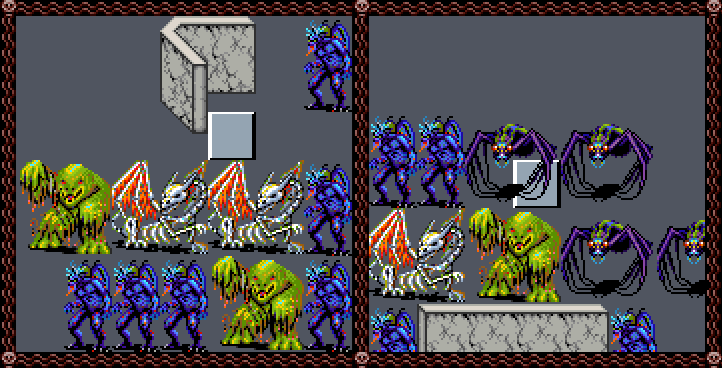
In addition to the priests and cultists, fights also included many Bits O’ Moander. They come in three varieties: small green, big green, and big red. The small green ones can paralyze, the big green ones can turn party members to stone, and the big red ones can poison. They are also immune to fire, but Magic Missile, Ice Storm, Cone of Cold, Hold Monsters, and Blade Barrier all did pretty well against them. However, they have high hitpoints and can take a beating, so even all these fairly effective spells often proved not effective enough to to prevent major damage to the party.
After defeating Marcus and his cultists, the tower began to crumble, either because we knocked a bunch of holes in it, Rampage-style, as we fought our way to the top, or because it was just being held together by Marcus’s magic and couldn’t maintain structural integrity once he was dead. We had to make a leap of faith onto the vessel of Moander, a bowl of dripping green ooze suspended in the air that was feeding the manufacturing processes in the tower.
The ooze was Moander’s lifeblood, harvested to create Bits O’ Moander, walking trees, and other animated plants that mindlessly serve the cultists. With Marcus dead, the flow of Moander’s lifeblood ebbed, and the bowl was revealed to be a Pool of Darkness! We dove in, met Elminster, and he ushered us into the realm of Moander to defeat Tenatal, Bane’s lieutenant who had taken up residence in Moander’s heart.

Various tasks were completed in various body parts of this sleeping emerald adonis to make our trek to the heart easier, including:
- Rescuing some prisoners held by cultists on Moander’s foot. I don’t think this had any real impact on the rest of the action, but it made us feel like good people, and we got some starting equipment with which to tackle this dimension.
- Befriending a hermit in Moander’s ear, who told us the general direction of where to find Aeghwaet and trained us!
- Rescuing a priestess from cultists and fire elementals in Moander’s hair. (Which, the presence of fire elementals in Moander’s hair seems…rather dangerous? Although, a being made of rotting plants probably stays pretty fire resistant.) Upon rescuing her, she informed us where to find Aeghwaet, and that she dropped an amphora somewhere in his hair, and if we found it and threw it down Moander’s throat, it would slow his heartbeat. (We found it.)
- Entering the brain via a tear duct. In the brain, black mages were installing devices that would allow them to watch Moander’s thoughts. I wasn’t sure what to do here, so I destroyed two of the devices and looked into two of the others, where I saw one vision of an army marching through Moander’s interior, and another of a battle between Moander and a bunch of elves in which the elves shot Moander in the heart with a giant arrow. After looking into the devices, I did not have the option to destroy them.
- A big wound in his arm, which is where we found Aeghwaet. He has lived inside Moander for 3,500 years, as the environment is congenial to his health, but now that evil forces are harvesting bits of Moander, his home is threatened, and Moander’s body is fighting back, making no distinction between Aeghwaet and the bad guys taking pieces of him. Clearing out all of the monsters in Aeghwaet’s home netted us a reward of a couple of potions that, when poured on the wall of Moander’s heart, will weaken the tissue enough to allow us to cut through and enter.
- Mouth – Threw the amphora down Moander’s throat to slow his heartbeat.
Finally, we conquered Moander’s heart, which is one of the primary reasons why I never beat Pools of Darkness. I finally had to resort to the Clue Book to solve this thing. It is a creative puzzle, that’s for sure—navigating a giant being’s heart. It is also one of the most complex and irritating multi-part puzzles in any game I have ever played.

- As you might expect, Moander’s heart beats, and if we were in an artery, atrium, or ventricle when it happens, the beat flushed us to one of the entrances of the heart, where we had to collect ourselves, figure out where we were, and start over. We avoided the heartbeats by taking shelter in the muscle tissue at the right times.
- Tenatal was in the heart, of course, but there were also a number of fake Tenatals that wandered throughout the arteries and tissue. Sometimes, if we laughed along with the fake Tenatals, they left us alone. Other times, we had to fight them and the goons that accompany them.
- Slimy organisms clung to us, which severely decreased our movement speed, making an already tedious dungeon even worse.
- Some of the random encounters in this area were nearly unbeatable. Bits O’ Moander and iron golems patrolled the heart, and sometimes, there were SO many of them in a single encounter that we couldn’t win and realistically continue the dungeon crawl. We were often left with one or two party members alive, and it was nearly impossible to rest safely in the heart, so bringing the party back to reasonable health without another random encounter was extremely tough.
- Tenatal (well, the real Tenatal) hung out in the left ventricle, but if we attempted to enter, he would cause the ventricle to contract, which flushed us out. There was a long, complicated series of tasks to accomplish that gave us a leg up on Tenatal. They were as follows (I think):
- We had to find The Watcher, an elf who lives in the heart. Her purpose is to regulate the heart to help maintain Moander’s eternal slumber. At first, she was upset that we were there, but when we later found her and rescued her from Bits O’ Moander, she warmed up a bit, and told us to mix the two potions from Aeghwaet and apply them to ourselves to remove the slimy organisms, restoring our movement speed (for a time).
- A little ball of slime with a mouth begged us for food. We took it with us after befriending it, and it warned us of upcoming heartbeats, giving us a chance to duck into the muscle tissue and avoid being flushed out of the heart.
- We found a soldier who gave us a sketch he made of the heart, which we used as a rudimentary map.
- We found weapon-making tools somewhere in the heart, and then also found the giant arrow lodged in Moander’s heart. We could use the tools to craft weapons from the arrow, but they were random and not very good. Doing so irritated the wound and quickened Moander’s heart, at which point we had to go and find a giant golden cornucopia that was also in the heart for some reason, and bring it to the Watcher. However, it was so heavy that it took our entire party to carry it, so our movement speed was again diminished.
- The Watcher threw a bunch of spells into the cornucopia, and these calmed Moander, so we could resume normal navigation. The Watcher also gifted us a tuning fork that could be used to identify and destroy the fake Tenatals.
- Bits O’ Moander then stole an unguent from The Watcher, so we had to go in the pulmonary artery to retrieve it. While we were there, we also fought a big contingent of iron golems that were magnetized. The strong magnetic force of the golems also magnetized our weapons, which became important later.
- We retrieved the unguent and returned it to The Watcher. She noticed our magnetic weapons and suggested shocking the sides of the left ventricle to flush Tenatal out. It worked! But then, we had to find Tenatal somewhere else in the heart and chase him into the right ventricle, where The Watcher had prepared a trap. We chased him there, and he collapsed and apparently died from a heart attack, but it was a ruse. He got back up, killed The Watcher before she could execute her plan, and then turned on us, which initiated the final battle with Tenatal and the end of this entire god-forsaken mess in the heart.
- We defeated Tenatal (a much easier fight than Kalistes), grabbed his Talisman of Bane (the final item needed to gain access to the game’s finale), and got the hell out of there before anything else bad could happen.
- WHEW!

We returned to the Realms, got our stuff back, and proceeded to Mulmaster, which was the last city on the map that we hadn’t visited, in the farthest point away from where we started, so I assumed this was probably where the last part of the game would happen.
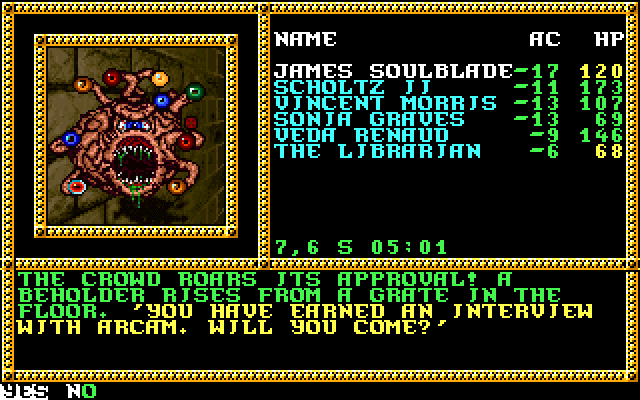
We fought a bunch of monsters in the Mulmaster Arena to earn an audience with Arcam, a powerful Beholder. However, when we found him in a room teeming with mercenaries, he of course fled deeper into the cave while the mercenaries turned their bloodthirsty attention to us. I guess we were kind of a big deal by this point in the game, and some of the top bad guys were getting a tad apprehensive about us.
We faced “The Labyrinth.” This is a puzzle that I got stuck on multiple times as a kid. The correct sequence through the labyrinth is to turn left and take a step, turn right and take a step, take two steps forward, then turn left twice, and the exit will reveal itself. We overheard a group of soldiers reciting the directions to get through, which went like this: “Left step, right step, step step, left left.” It’s a little ambiguous. Was I supposed to take a step forward at each of the last two lefts? Was I only supposed to turn and not step forward at left step and right step? Today, as an adult, it was easy, but as a kid, it was enough to make me quit playing more than once. I missed a bunch of stuff on those playthroughs, anyway, so it’s not like I was actually going to win had I bested the labyrinth.
We chased Arcam through the remainder of his cave, encountering numerous ambushes and organized resistance along the way. We overcame all of the obstacles and finally cornered Arcam. In a final showdown, we were able to finish him and his right-hand, uh, orb—an undead Beholder known as a Death Tyrant.
A few puzzles later, we found a Pool of Darkness. We were about to enter Bane’s Land, and the final portion of the game!
Upon crossing over into Bane’s Land, we immediately stumbled upon Drow tormenting Sasha. Some of the Drow carried her off, while the rest turned their attention to us.
We stepped out into the street to find ourselves in Dark Phlan, which is the evil equivalent of regular Phlan, as you might expect. We got swept up in a tide of monsters that carried us to none other than a speech being made by Porphyrys Cadorna, a traitorous ex-councilmember of Phlan that we killed in Pool of Radiance! Now, his zombie intended to marry poor Sasha!
We had some time to kill before crashing this unholy matrimony, so we took care of some business around Dark Phlan, including fighting some Drow preparing Sasha’s wedding dress, which we burned on her behalf. We also eliminated some vampires building a mausoleum, minions of Bane building shrines to the evil god, and other acts that probably seemed normal in Dark Phlan, but were pretty bad in our eyes. We also found another ex-councilmember of Phlan, Gragnak Ulfim, who also was in love with Sasha and hatched a plan with Cadorna to “rescue” her and win her love. Obviously, this was a double-cross by Cadorna, Ulfim found himself stranded and helpless in Dark Phlan, and Sasha is apparently Desirable no. 1 in the Forgotten Realms.
We also started collecting bows and arrows from our fallen enemies. These will become important later, in a way that bows and arrows have not been important in any of the four games in the series up to this point.
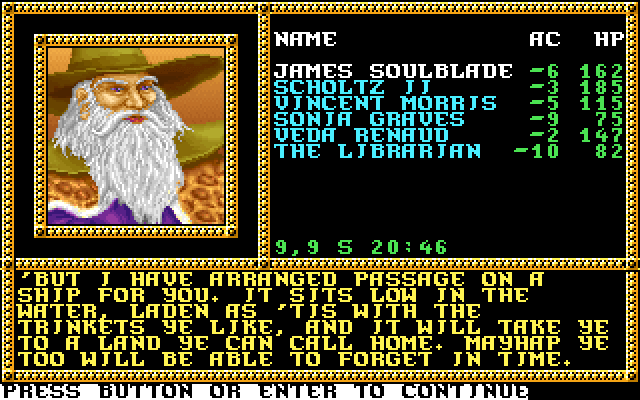
We crashed the wedding. Gothmenes, Bane’s final living lieutenant and officiant for the ceremony, gave Cadorna a verbal lashing for failing to stop us, then bolted for his fortress of doom, leaving us to face the honored guests—a collection of evil mages, undead, and demonic minions of Bane, the usual fare for an evil wedding. Oh, and the irate groom, of course. I’d like to tell you it was a battle for the ages, but Cadorna and his goons didn’t really stand a chance. We took Sasha back to safety in Limbo, where we trained for the last time, and my final dual-classed characters got their original class abilities back. Gothmenes and his forces would be up against:
- James – Paladin/Cleric
- Veda – Ranger/Mage
- Vincent – Cleric/Ranger
- Scholtz II – Fighter/Thief
- Sonia – Mage/Ranger
- Librarian – Mage
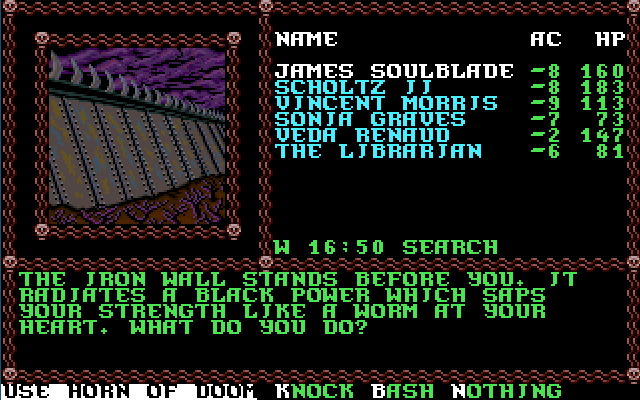
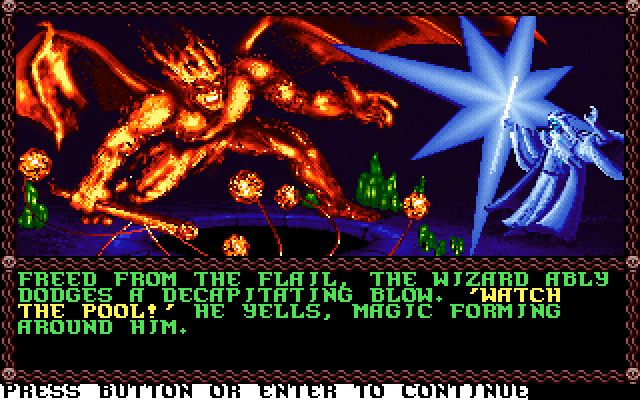
We reached the fortress and blew the Horn of Doom six times, once for each party member, which blew a hole in the wall and allowed us access. A series of puzzles involving our gathered artifacts—the Horn, the Crystal Ring, and the Talisman of Bane—followed, and we eventually found ourselves near a sinister pool in the inner sanctum of the fortress. The Librarian, the party member holding the Crystal Ring, waded in and pulled the Crystal of Bane from the center of the pool. This attracted the attention of Gothmenes, who figured out that Elminster was hiding in Limbo and dragged him back to the fortress, where the two engaged in a Gandalf vs. Balrog-esque fight between wizard and demon.
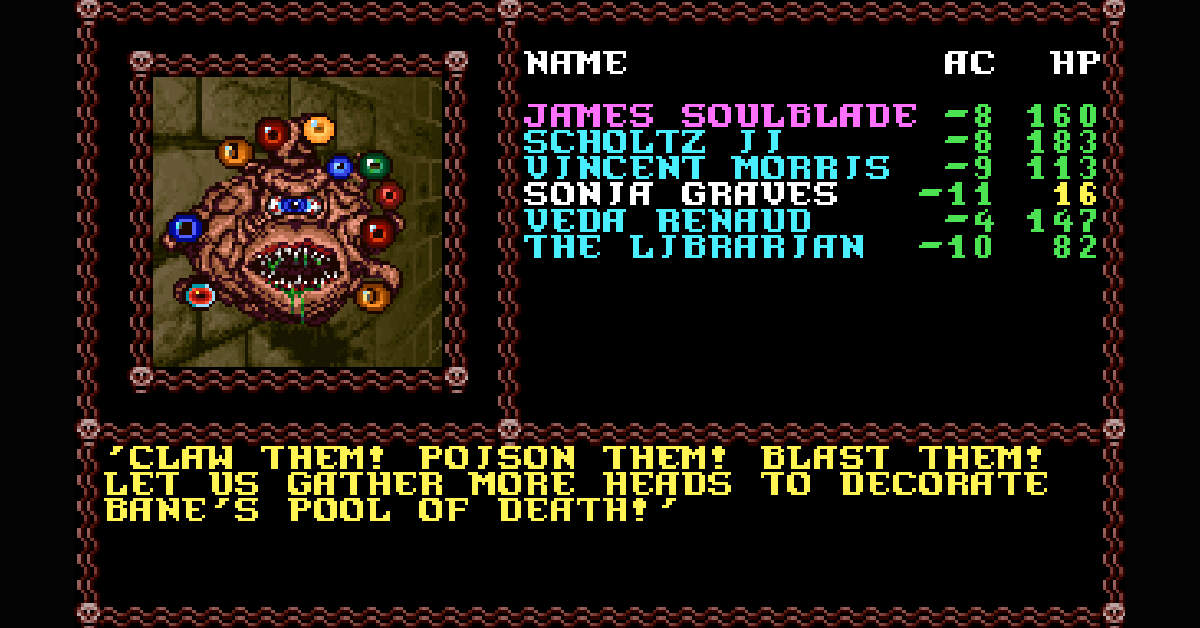
Meanwhile, an overwhelming number of Bane’s forces poured out of a pool of darkness. However, at the cost of almost all of The Librarian’s hitpoints, he used the Crystal of Bane to eradicate half of them. This still left us with an almost-overwhelming number of Dracoliches, blue Minions of Bane, Pets of Kalistes, and green Bits O’Moander. With my party buffed with as many buffing spells as I could muster, we entered the 3-part final battle I’ve been dreading and masochistically anticipating. But mostly dreading.
Part 1: Part 1 took at least 15-20 tries to get right, and even when I got Part 1 right, I ended up dying in Part 3 multiple times, too.
No matter what I did, The Librarian usually got one fireball off before being killed by something. His job was to kill as many of the blue Bane minions and Pets of Kalistes (the two enemy types in this encounter not immune to fire) as possible, while the melee fighters laid into the Dracoliches and Bits. While I could have used a Heal spell from one of my clerics to bring The Librarian back to nearly full health, their turn was frankly better spent inflicting damage. As a pure mage, The Librarian would be almost completely useless in parts 2 and 3 of the final battle (more on that later), so for him to serve as sacrificial lamb here was honestly the best thing he could do. A couple of additional fireballs from the ranger/mages mopped up the remaining blue minions and Pets, and the hastened fighters brought down the rest. I had to scatter the party as much as possible to minimize area-of-effect attacks from the dracoliches and bouncing lightning bolts from the Bane minions. On the winning attempt, everybody but The Librarian survived Part 1, but not without heavy damage. I moved the party back together and burned through heal spells to bring them back from the brink for Part 2!
Part 2: This was an interesting fight against a corps of Beholders that takes place as Elminster and Gothmenes continue their duel. Beholders are immune to magic, so this fight was a race against time mixed with a prayer: cut down the Beholders with melee attacks before any of their insta-kill magic spells worked and brought down more party members. I needed everybody I could get for Part 3, and there is no way to raise a party member from the dead during combat. Without a break between combats, losing anybody else in Part 2 drastically reduced my chances to get out of Part 3 alive. On the winning attempt, I didn’t lose anybody in Part 2, so I entered Part 3 with five relatively healthy party members. Things were looking good, but I was only a handful of poor rolls away from death at any given time. Beholders also like to cast Slow, negating the Haste spell I cast at the beginning of the final battle. At the end of the fight, I had to reassemble the party and re-Hasten them as best as I could, but the spell doesn’t work as well in combat as it does out of combat, due to the limitations of the game mechanics.
Part 3: Here is where things got really dicey. For Part 3, we were up against Gothmenes, himself, along with more Bits O’Moander and blue Bane minions. But, before the fight began, Gothmenes pleaded for help from Bane, and he delivered by draining our magic, which meant no spells for this fight.
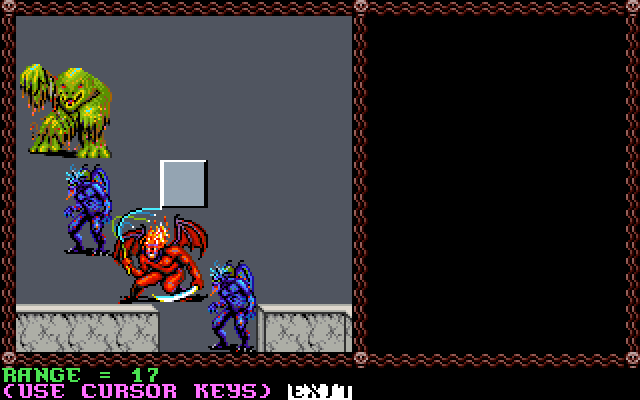
To make matters worse, blue Bane minions cannot be attacked directly with melee weapons—doing so causes them to “zap” party members for double the damage inflicted on them. So, if one of my fighters inflicted 20 damage, the fighter would take 40 damage in return! This is why I started collecting those bows and arrows earlier—ranged weapons are the only way to survive this battle, as there are too many Bane minions to melee, and no magic spells available to cast.
To make matters even worse, Gothmenes is equipped with a Vorpal Long Sword, and he was more than happy to behead my party members left and right with a much greater chance of success than I had with my own Vorpal Long Sword. So, Gothmenes needed to be taken out as quickly as possible before getting an opportunity to fight back.
The final complication is that the Bane minions also have a ranged lightning attack that does tons of damage and bounces off walls, so the party starts the fight at risk of being obliterated by a hail of lightning bolts at any given time. The trick, it turned out, was to move the party into a corridor off the main chamber and lure the enemies to them two or three at a time. From there, the Bane minions could be peppered with arrows, and we could minimize the number of lightning bolts flying at us at any given time.
This was a tough, tough fight, requiring a lot of patience and chutzpah. I think It’s designed to be a battle of attrition. Playing the game fairly, I don’t see a way to come out of this fight without heavy losses. This is supposed to be the culmination of all of the party’s struggles: one final battle against the ultimate evil, fought without the best equipment or even the ability to cast magic. It’s not easy! Even after surviving Parts 1 and 2, I lost Part 3 two or three times before I got it right, including one instance in which I killed everything except Gothmenes, and then he beheaded my three remaining party members in one turn to give me a Game Over. It was devastating. I almost gave up there. But, I kept at it, and found myself back at Part 3 several attempts later. This time, I made sure to kill Gothmenes sooner, but the fight still came down to just two remaining party members. (Vincent and Sonia, I believe, but I could be wrong.) They had just enough arrows and hitpoints left to finish off the remaining two or three Bane minions, and finally, Bane’s forces were defeated, and we found ourselves back in Phlan at the time just before this whole mess started, all set to escort Sasha through the lands of Thar.

We seemed to be the only people in town who remembered what happened. The Realms were so peaceful that Sasha decided she didn’t need us for bodyguard duty, after all, and let me tell you, that boat to paradise sounded pretty nice after our latest adventure. The harbormaster also offered us a spot on a “challenge ship,” which, from what I understand, is a special bonus dungeon and an opportunity at an even greater challenge than the one we just faced. Needless to say, we passed. Retirement sounded too good.
That’s Pools of Darkness! I had a great time revisiting it—and finally finishing it—probably 20 years after my last earnest attempt. It, as well as the other three games in the series, are seminal roleplaying experiences from my childhood, and I’m glad to have had the opportunity to share some of my time with the game with you, even though you ended up getting the truncated version. Now that I finally finished Pools of Darkness, I feel like I’ve given the series the attention it deserves, and it felt great to slay the white whale once and for all.
Thanks for reading!
Want to play Pools of Darkness yourself? Get it and the rest of the Gold Box games on GOG.com! No, I’m still not being paid to tell you this.